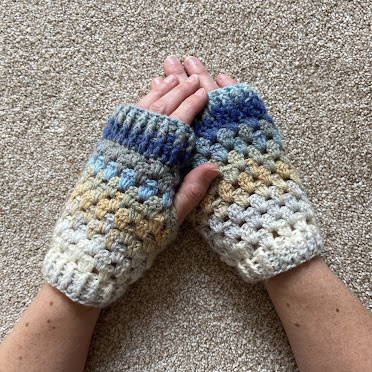
The pattern is named for our local heathland where we spend many happy hours walking as a family. I hope you enjoy making these, happy hand warmer making!
You can buy a lovely ad-free PDF version of this pattern here!
Pattern is written in US terminology
Yarn:
Any DK yarn. The samples I made used around 59g per pair (using DK yarn with 225m per 100g).
The speckled sample you see above is Craft House Magic yarn in the colour "Land of Make Believe".
Tools:
- 3mm hook, or size needed to obtain
gauge.
- Crochet stitch markers (lobster clasp or
bulb pins).
- Darning needle for weaving in ends.
- Scissors
Gauge:
18sts
and 10 rows = 4”/10cm in granny stitch
(These are not designed as fitted mitts so a small variation in gauge shouldn’t cause too many problems, but remember if you don’t have gauge you could end up with mitts smaller or bigger than intended, and the amount of yarn you need to complete your mitts will change.)
This pattern is in a size that will fit most hands with ease.
In the paid-for PDF (available here) I have included an option for a slightly smaller size if you prefer your mitts snug, or you have teeny hands, or you’re making the Heath Hand Warmers for a smallish person :)
The finished measurements are roughly:
Chain
36 (leave a longish tail at beginning for sewing in later)
Rnd 1 (link):
You have two options – the usual way, which is to hdc in 4th chain from hook and in every chain across (34hdcs incl. turning chain).OR! You can use my Upside Down method: Locate the 4th chain from the hook and flip to show back bump on underside of chain – work an hdc in this bump and in every bump across. (34hdcs incl. turning chain)
Video Link! I show you how to sew the little gap created after you join to work in the round in rnd 2.
Rnd 2 (link):
Sl st to top of turning ch3 to join to work in the round (careful not to twist!). Ch2 (doesn’t count as stitch), fphdc around stitch directly below (the turning chain) Bphdc around next hdc. Continue around alternating fphdc and bphdc, finishing on a bphdc. Join with sl st in top of first fphdc. (34sts - 17 fphdcs and 17 bphdcs)Tip! Place markers in the first fphdc and last bpdc of the cuff rounds to help you find your way if you are new to this stitch.
Rnd 3 (link):
Rnd 4 (link):
Main Mitt Bottom
Rnd 5 (RS) (link):
Rnd 6 (WS) (link):
Rnd 7 (RS) (link): Repeat rnd 6.
Rnd 8 (WS) (link): Repeat rnd 6.
Rnd 9 (RS) (link): Repeat rnd 6.
Create
Thumb Hole
Rnd 10 (WS) (link):
Ch3 (counts as dc), 2dc in gap between clusters below, *sk 3dc cluster, 3dc in next gap. Repeat from * until 3dc remain. Do not join. Turn.
(You’re just over halfway done!)
Rnd 11 (RS) (link):
Ch3 (counts as dc), sk the first 3dc cluster, 3dc in the next gap between clusters and in each gap around until one 3dc cluster remains, sk2, dc in last st, turn. (35dcs)Rnd 12 (WS) (link):
Ch3 (counts as dc), sk first 2dc cluster, 3dc in gap *sk3, 3dc in next gap. Repeat from * until 1 2dc cluster remains, sk 1, 1dc in last st, sl st in top of ch3 to join. Turn. (35dcs)
Main
Mitt Top
Rnd 15 (RS) (link):
From now on we will only be working on the right side, no more turning!
Top
Cuff
Rnd 16 (RS) (link):
Tip! Place markers in the first fpdc and last bpdc of the cuff rounds to help you find your way if you are new to this stitch.
Rnd 17 (RS) (link):
Rnd 18 (RS) (link):
Rnd 19 (RS) (link):
Video Link! I show you how to fasten off invisibly at the end of the mitt.
Thumb Border - Both Sizes
With mitten right way up join yarn with sl st to centre st of the 3dc cluster at the bottom of thumb.
Video Link! I show you where to join your yarn and how to work the thumb border.
Rnd 1:
Ch1 (does not count as stitch), sc in same st (place marker in this sc), sc in next dc, 2sc around the body of every dc up the side of the thumb, sk the bottom of the 3dc cluster at the top of the thumb, turn the mitt around and work 2sc around the body of every dc down the other side of the thumb, sc in the remaining dc of the ch3 cluster at the bottom of the thumb. (19scs)Rnd 2:
Mitt Modifications!
* Adjust! Want a longer or shorter cuff at the bottom or top? Just add or subtract rounds!
Happy Mitt
Making!


