
This is a simple little granny square pattern I made up a few years ago and I thought it would be fun to share a tutorial for how to make them. I have written this tutorial in quite a detailed way and I have also created a PDF to show in teensy tiny detail how to do the first round using the magic ring technique. So this pattern should be suitable for every crochet ability! But of course if you have any questions at all just comment below or pop along to my Ravelry Group to ask for help.
Tools and Info:
- Terminology - I use US terminology in this tutorial.
- DK yarn - I used scraps of DK acrylic yarn as I started this as a way to use up all my old acrylic stash. But you can use any yarn you like, this is a great way to use up even the teensiest of scraps.
- 4mm crochet hook (or appropriate hook size for your yarn)
- Gauge - not important
Abbreviations:
- Ch - Chain
- DC - Double crochet (US terms)
- SC - Single crochet (US terms)
- St St - Slip Stitch
First make a magic ring and ch3 (counts as dc), then make 2dc into the ring and ch2. (If you would like to see detailed instructions on how to complete the first round of this Granny Square using a magic ring please take a look at my PDF instructions.)


Step 2 - Complete the first round
3dc into the ring, ch2, 3 times. You now have four sets of 3dc and four ch2s. Join to the top of the first ch3 with a sl st. Now pull the magic ring tight to close it.


Join with a Sl St Pull the Magic Ring closed
Step 3 - Complete the second round
Ch3 (counts as dc), then make 2dcs into the ch2 space just behind - it'll feel like you are going backwards but by the time this second round is finished it'll look great!


Now ch1, then *3dc, ch2, 3dc, ch1 into the next ch2 space. Repeat from * another 2 times. In the next ch2 space (where I am pointing my pencil in the first photo below) you already have the ch3,2dc you started with. In that same space make 3dc, ch2 then join to the top of the starting chain with a sl st (where I am pointing with my pencil in the second photo below)


Hurrah! Fasten off and weave in those ends because you've just completed the first two rounds!

Step 4 - Join the white yarn
Time to add the white border! The white border is made up of three very simple rounds. First join the white yarn into any of the corner ch2 spaces. I make a slip knot on my hook, insert the hook into the ch2 space, pull the yarn through the ch2 space and through the slip knot, making a sl st.


Make a slip knot on the hook Pull the yarn through the ch2 space...

Step 5 - Start the third round
Ch3 (counts as dc), 2dc, ch2, 3dc all in the same ch2 space.


Step 6 - Make the spiked stitch
Ch1, then make 1dc in the next ch1 space. Now we are going to make the spike stitch that gives the square the "multiplication" shape. You are going to make the next dc into the middle dc of the round below. In the first picture below I am pointing to where you will make the spike with my pencil.


1dc in the middle dc on the round below Completed spike stitch
After making the dc into the round below, you will make the third dc in the ch1 space of the current round. You now have three dcs: the first in the ch1 space of the current round, the second in the middle dc of the round below, and the third in the ch1 space of the current round, like so:

Step 7 - Complete the third round
Ch1, *3dc, ch2, 3dc in the next corner ch2 space, ch1 and then make 1dc, 1 spike stitch, 1 dc into next ch1 space, ch1. Repeat from * two more times then join with a sl st to the top of the starting ch3.

Step 8 - The fourth round
For the fourth round we are going to make a sc into every dc and every ch1 space, and 3sc into every corner ch2 space. To start - ch1 then make a sc into the same stitch that you made your joining sl st into. Then make 1sc into each of the next 2dcs, then 3dcs into the corner ch2 space.

Step 9 - The fifth and final round
Ch1 then make 1sc into the same stitch where you made your joining sl st. Now make 1sc into every sc around, make 3sc into each corner sc.

You're finished! You have completed your first Multiplication Square!
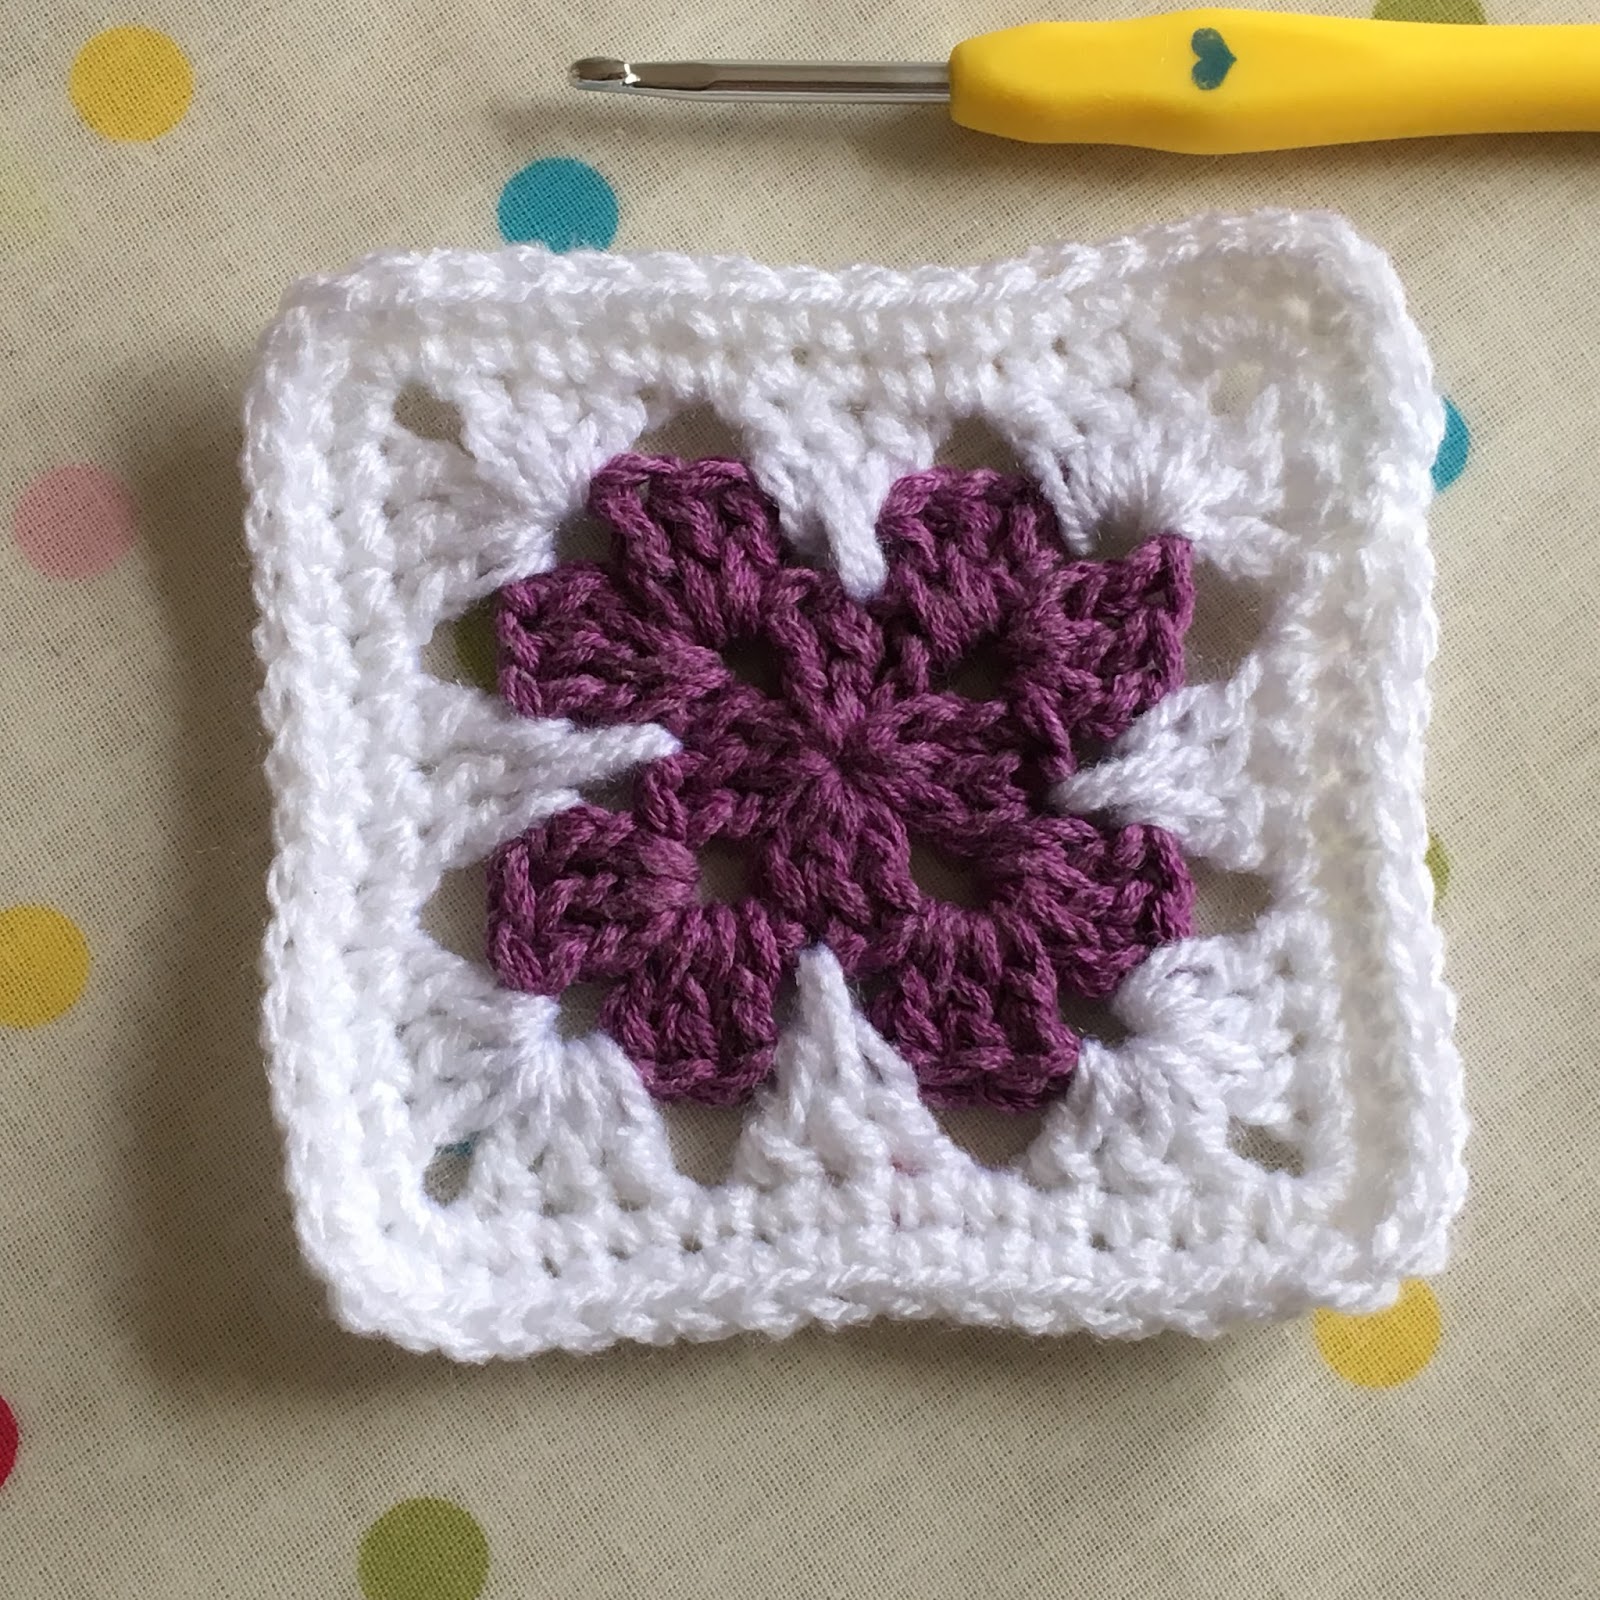
Now you can go forth and make more! I have been using scraps in all the colours of the rainbow to make my first two rounds. You could do them using just one or two colours, or using leftover hand-dyed - whatever you feel like!

In the next few weeks I hope to create the tutorial for making these squares into a blanket and I will link to that tutorial from this post once it's ready.
If you have any questions at all please leave me a comment and I will do my best to help.
Happy crocheting!
Ali xx
Found your youtube podcast from 2018. My granddaughter and I really like your granny square. Clever idea.
ReplyDelete